Tag Archives: coding

I’ve written a few posts on how to speed up web sites by sending the correct headers to leverage browser caching and compressing .php, .css and .js files without mod_gzip or mod_deflate.

The intended audience for this post is developers who have already applied most or all of Google’s Web Performance Best Practices and Yahoo’s Best Practices for Speeding Up Your Web Site and are wondering how to speed up WordPress sites in particular.

I assume you’re familiar with WordPress caching and are already using a caching plugin, such as WP Super Cache, W3 Total Cache or the like.

Reduce HTTP requests

Reducing HTTP requests should be the very first thing step in speeding up any site. If you are using plugins, watch them carefully for inefficiencies like added CSS and JavaScript files. Combine, minify and compress these files. Some plugins allow you to turn off their bundled CSS in the plugin’s settings page. Where possible, copy the plugin’s CSS into the current theme’s style.css and turn off the extra file.

Delete deactivated plugins

Remove any plugins you’re not using. Deactivated plugins can be deleted from the Plugins page.

Speed up the mod_rewrite code

jdMorgan from WebmasterWorld.com has written a replacement for the .htaccess rewrite rule used by WordPress. This will speed up the WordPress mod_rewrite code by a factor of more than two.

This is a total replacement for the code supplied with WP as bounded by the “Begin WP” and “End WP” comments, and fixes several performance-affecting problems. Notably, the unnecessary and potentially-problematic container is completely removed, and code is added and re-structured to both prevent completely-unnecessary file- and directory- exists checks and to reduce the number of necessary -exists checks to one-half the original count (due to the way mod_rewrite behaves recursively in .htaccess context).

http://www.webmasterworld.com/apache/4053973.htm

The following code is adapted from the original to add png, flv and swf to the list of static file formats:

# BEGIN WordPress
# adapted from http://www.webmasterworld.com/apache/4053973.htm
#
RewriteEngine on
#
# Unless you have set a different RewriteBase preceding this point,
# you may delete or comment-out the following RewriteBase directive
# RewriteBase /
#
# if this request is for "/" or has already been rewritten to WP
RewriteCond $1 ^(index\.php)?$ [OR]
# or if request is for image, css, or js file
RewriteCond $1 \.(gif|jpg|png|ico|css|js|flv|swf)$ [NC,OR]
# or if URL resolves to existing file
RewriteCond %{REQUEST_FILENAME} -f [OR]
# or if URL resolves to existing directory
RewriteCond %{REQUEST_FILENAME} -d
# then skip the rewrite to WP
RewriteRule ^(.*)$ - [S=1]
# else rewrite the request to WP
RewriteRule . /index.php [L]
#
# END wordpress 

Only load the comment-reply.js when needed

In the default WordPress template, the comment-reply.js script is included on all single post pages, regardless of whether nested/threaded comments is enabled. A simple tweak changes the theme to only include comment-reply.js on single post pages only when it makes sense to do so: if threaded comments are enabled, commenting on that post is allowed, and a comment already exists.

Remove the following line from your theme’s header.php:

<?php if ( is_singular() ) wp_enqueue_script( 'comment-reply' ); ?>

Add the following lines to your theme’s functions.php.

// Don't add the wp-includes/js/comment-reply.js?ver=20090102 script to single post pages unless threaded comments are enabled
// adapted from http://bigredtin.com/behind-the-websites/including-wordpress-comment-reply-js/
function theme_queue_js(){
  if (!is_admin()){
    if (is_singular() && (get_option('thread_comments') == 1) && comments_open() && have_comments())
      wp_enqueue_script('comment-reply');
  }
}
add_action('wp_print_scripts', 'theme_queue_js');

Only load the l10n.js when needed

In WordPress 3.1, a l10n.js script is loaded. It is “mostly used for scripts that send over localization data from PHP to the JS side using wp_localize_script().” Whether it’s safe to remove this file seems to be a matter of debate, but should you decide you want to remove it…

Add the following lines to your theme’s functions.php.

// Don't add the wp-includes/js/l10n.js?ver=20101110 script to non-admin pages
// adapted from http://wordpress.stackexchange.com/questions/5451/what-does-l10n-js-do-in-wordpress-3-1-and-how-do-i-remove-it
function remove_l10n_js(){
  if (!is_admin()){
    wp_deregister_script('l10n');
  }
}
add_action('wp_print_scripts', 'remove_l10n_js');

Replace unecessary code executions and database queries

WordPress saves settings specific to your blog in the database. These settings include what language your blog is written in, whether text is read left-to-right or vice versa, the path to the template directory, etc.

The default WordPress theme contains a number of database queries in order to figure out these things and build the correct page. The default theme needs this flexibility, but your theme does not. Joost de Valk recommends replacing these database queries with static text in your theme files in his post Speed up WordPress, and clean it up too!

An easy way to do this is to browse to your web site and then view the source code. Copy the content that won’t change from page to page and paste it into your theme, overwriting the PHP with the generated HTML.

For example, my theme’s header.php file contains this line:

<html xmlns="http://www.w3.org/1999/xhtml" <?php language_attributes(); ?>>

The source code of the rendered page displays this line:

<html xmlns="http://www.w3.org/1999/xhtml" dir="ltr" lang="en-US">

On my blog, this HTML output is never going to be anything different, so why make WordPress look these settings up in the database each time a page is loaded? This line is an excellent candidate for replacement. The footer.php file contains a handful more opportunities for replacement, but go through each of your theme’s files and look for references to the template directory and other data that won’t change as long as you’re using the theme. All told, I was able to replace 12 database queries with static HTML.

Joost also recommends checking for unnecessary or slow database queries, and installing a helpful debugging plugin, in his post on Optimizing WordPress database performance.

Clean out your MySQL database

Delete spam comments

From the Dashboard, click Comments, then click on Empty Spam.

Delete post revisions

If you don’t use post revisions, you may want to delete them from the wp_posts table. Back up your database, then run the following SQL query:

DELETE FROM wp_posts WHERE post_type = "revision";

Before: 683 records
After: 165 records

This does not delete the latest draft of unpublished posts. It’s a good idea to optimize the table after deleting the revisions.

You can stop WordPress from saving post revisions by adding the following code to wp-config.php:

define('WP_POST_REVISIONS', false );

Optimize your MySQL database

Optimizing your MyISAM tables is comparable to defragmenting your hard drive. It’s probably been a while since you’ve done that, too.

If you’re using phpMyAdmin, browse to your WordPress database. Under the Structure tab, at the bottom of the list of tables, click on the link “Check all”. In the “With selected” menu, choose “Optimize table”. (I would have recommended just optimizing tables that have overhead, but the wp_posts table can be optimized even when it doesn’t show any overhead.

For MyISAM tables, OPTIMIZE TABLE works as follows:

  • If the table has deleted or split rows, repair the table.
  • If the index pages are not sorted, sort them.
  • If the table’s statistics are not up to date (and the repair could not be accomplished by sorting the index), update them.

http://dev.mysql.com/doc/refman/5.1/en/optimize-table.html

Flush the Buffer Early

When users request a page, it can take anywhere from 200 to 500ms for the backend server to stitch together the HTML page. During this time, the browser is idle as it waits for the data to arrive. In PHP you have the function flush(). It allows you to send your partially ready HTML response to the browser so that the browser can start fetching components while your backend is busy with the rest of the HTML page. The benefit is mainly seen on busy backends or light frontends.

http://developer.yahoo.com/performance/rules.html#flush

Add flush() between the closing tag and the opening tag in header.php.

</head>
<?php flush(); // http://developer.yahoo.com/performance/rules.html#flush ?>
<body>

OK, so this isn’t technically a WordPress-specific tweak, but it’s a good idea.
As a follow-up to my post on compressing .php, .css and .js files without mod_gzip or mod_deflate, I’m documenting the changes I made to the .htaccess file on ardamis.com in order to speed up page load times for returning visitors and satisfy the Leverage browser caching recommendation of Google’s Page Speed Firefox/Firebug Add-on.

A great explanation of why browser caching helps the web deliver a better user experience is at betterexplained.com.

Two authoritative articles on the subject are Google’s Performance Best Practices | Optimize caching and Yahoo’s Best Practices for Speeding Up Your Web Site | Add an Expires or a Cache-Control Header.

I’d like to point out that in researching browser cashing, I came across a lot of information that contradicted the rather clear instructions from Google:

It is important to specify one of Expires or Cache-Control max-age, and one of Last-Modified or ETag, for all cacheable resources. It is redundant to specify both Expires and Cache-Control: max-age, or to specify both Last-Modified and ETag.

I’m not sure that this recommendation is entirely correct, as the W3C states that Expires and Cache-Control max-age are used in different situations, with Cache-Control max-age overriding Expires in the event of conflicts.

If a response includes both an Expires header and a max-age directive, the max-age directive overrides the Expires header, even if the Expires header is more restrictive. This rule allows an origin server to provide, for a given response, a longer expiration time to an HTTP/1.1 (or later) cache than to an HTTP/1.0 cache.

http://www.w3.org/Protocols/rfc2616/rfc2616-sec14.html

It would seem that Cache-Control is the preferred method of controlling browser caching going forward.

HTTP 1.1 clients will honour “Cache-Control” (which is easier to use and much more flexible).
HTTP 1.0 clients will ignore “Cache-Control” but honour “Expires”. With “Expires” you get thus at least a bit control for these old clients.

http://www.peterbe.com/plog/cache-control_or_expires

In any event, Page Speed won’t protest if you do end up sending both Expires and Cache-Control max-age, or if you remove both Last-Modified and ETag, but I was able to get the best results with just setting Cache-Control max-age and removing the ETag.

Setting the headers in .htaccess

On Apache, configuring the proper headers can be done in the .htaccess file, using the Header directive. The Header directive requires the mod_headers module to be enabled.

I’m choosing to set a far future Expires header of one year on my images files, because I tweak the CSS and JavaScript pretty often, and don’t want those file types to be cached as long.

Add the following code to your .htaccess file to set your Cache-Control and Expires headers, adjusting the date to be one year from today.

# Set Cache-Control and Expires headers
<filesMatch "\\.(ico|pdf|flv|jpg|jpeg|png|gif|swf|mp3|mp4)$">
Header set Cache-Control "max-age=2592000, private"
Header set Expires "Sun, 17 July 2011 20:00:00 GMT"
</filesMatch>
<filesMatch "\\.(css|css.gz)$">
Header set Cache-Control "max-age=604800, private"
</filesMatch>
<filesMatch "\\.(js|js.gz)$">
Header set Cache-Control "max-age=604800, private"
</filesMatch>
<filesMatch "\\.(xml|txt)$">
Header set Cache-Control "max-age=216000, private, must-revalidate"
</filesMatch>
<filesMatch "\\.(html|htm)$">
Header set Cache-Control "max-age=7200, private, must-revalidate"
</filesMatch>

Removing ETags in .htaccess

Most sources recommend simply removing ETags if they are not required.

Entity tags (ETags) are a mechanism that web servers and browsers use to determine whether the component in the browser’s cache matches the one on the origin server.

If you’re not taking advantage of the flexible validation model that ETags provide, it’s better to just remove the ETag altogether.

http://developer.yahoo.com/performance/rules.html#etags

Add the following code to your .htaccess file to remove ETag headers.

# Turn off ETags
FileETag None
Header unset ETag

Set Expires headers with ExpiresByType (optional)

If your host has the mod_expires module enabled, you can specify Expires headers by file type. Godaddy does not have this module enabled.

# Set Expires headers
ExpiresActive On
ExpiresDefault "access plus 1 year"
ExpiresByType text/html "access plus 1 second"
ExpiresByType image/gif "access plus 2592000 seconds"
ExpiresByType image/jpeg "access plus 2592000 seconds"
ExpiresByType image/png "access plus 2592000 seconds"
ExpiresByType image/x-icon "access plus 2592000 seconds"
ExpiresByType text/css "access plus 604800 seconds"
ExpiresByType text/javascript "access plus 604800 seconds"
ExpiresByType application/x-javascript "access plus 604800 seconds"

Removing the Last-Modified header in .htaccess (optional)

I’m following Google’s instructions and not removing the Last-Modified header, but if you wanted to do so, you could use:

# Remove Last-Modified header
Header unset Last-Modified

Busting the cache when files change

What happens when you change files and need to force browsers to load the new files? Christian Johansen offers two methods in his post on Using a far future expires header.

File compression is possible on Apache web hosts that do not have mod_gzip or mod_deflate enabled, and it’s easier than you might think.

A great explanation of why compression helps the web deliver a better user experience is at betterexplained.com.

Two authoritative articles on the subject are Google’s Performance Best Practices documentation | Enable compression and Yahoo’s Best Practices for Speeding Up Your Web Site | Gzip Components.

Compressing PHP files

If your Apache server does not have mod_gzip or mod_deflate enabled (Godaddy and JustHost shared hosting, for example), you can use PHP to compress pages on-the-fly. This is still preferable to sending uncompressed files to the browser, so don’t worry about the additional work the server has to do to compress the files at each request.

Option 1: PHP.INI using zlib.output_compression

The zlib extension can be used to transparently compress PHP pages on-the-fly if the browser sends an “Accept-Encoding: gzip” or “deflate” header. Compression with zlib.output_compression seems to be disabled on most hosts by default, but can be enabled with a custom php.ini file:

[PHP]

zlib.output_compression = On

Credit: http://php.net/manual/en/zlib.configuration.php

Check with your host for instructions on how to implement this, and whether you need a php.ini file in each directory.

Option 2: PHP using ob_gzhandler

If your host does not allow custom php.ini files, you can add the following line of code to the top of your PHP pages, above the DOCTYPE declaration or first line of output:

<?php if (substr_count($_SERVER['HTTP_ACCEPT_ENCODING'], 'gzip')) ob_start("ob_gzhandler"); else ob_start(); ?>

Credit: GoDaddy.com

For WordPress sites, this code would be added to the top of the theme’s header.php file.

According to php.net, using zlib.output_compression is preferred over ob_gzhandler().

For WordPress or other CMS sites, an advantage of zlib.output_compression over the ob_gzhandler method is that all of the .php pages served will be compressed, not just those that contain the global include (eg.: header.php, etc.).

Running both ob_gzhandler and zlib.output_compression at the same time will throw a warning, similar to:

Warning: ob_start() [ref.outcontrol]: output handler ‘ob_gzhandler’ conflicts with ‘zlib output compression’ in /home/path/public_html/ardamis.com/wp-content/themes/mytheme/header.php on line 7

Compressing CSS and JavaScript files

Because the on-the-fly methods above only work for PHP pages, you’ll need something else to compress CSS and JavaScript files. Furthermore, these files typically don’t change, so there isn’t a need to compress them at each request. A better method is to serve pre-compressed versions of these files. I’ll describe a few different ways to do this, but in both cases, you’ll need to add some lines to your .htaccess file to send user agents the gzipped versions if they support the encoding. This requires that Apache’s mod_rewrite be enabled (and I think it’s almost universally enabled).

Option 1: Compress locally and upload

CSS and JavaScript files can be gzipped on the workstation, then uploaded along with the uncompressed files. Use a utility like 7-Zip (quite possibly the best compression software around, and it’s free) to compress the CSS and JavaScript files using the gzip format (with extension *.gz), then upload them to your server.

For Windows users, here is a handy command to compress all the .css and .js files in the current directory and all sub directories (adjust the path to the 7-Zip executable, 7z.exe, as necessary):

for /R %i in (*.css *.js) do "C:\Program Files (x86)\7-Zip\7z.exe" a -tgzip "%i.gz" "%i" -mx9

Note that the above command is to be run from the command line. The batch file equivalent would be:

for /R %%i in (*.css *.js) do "C:\Program Files (x86)\7-Zip\7z.exe" a -tgzip "%%i.gz" "%%i" -mx9

Option 2: Compress on the server

If you have shell access, you can run a command to create a gzip copy of each CSS and JavaScript file on your site (or, if you are developing on Linux, you can run it locally):

find . -regex ".*\(css\|js\)$" -exec bash -c 'echo Compressing "{}" && gzip -c --best "{}" > "{}.gz"' \;

This may be a bit too technical for many people, but is also much more convenient. It is particularly useful when you need to compress a large number of files (as in the case of a WordPress installation with multiple plugins). Remember to run it every time you automatically update WordPress, your theme, or any plugins, so as to replace the gzip’d versions of any updated CSS and JavaScript files.

The .htaccess (for both options)

Add the following lines to your .htaccess file to identify the user agents that can accept the gzip encoded versions of these files.

<files *.js.gz>
  AddType "text/javascript" .gz
  AddEncoding gzip .gz
</files>
<files *.css.gz>
  AddType "text/css" .gz
  AddEncoding gzip .gz
</files>
RewriteEngine on
#Check to see if browser can accept gzip files.
ReWriteCond %{HTTP:accept-encoding} gzip
RewriteCond %{HTTP_USER_AGENT} !Safari
#make sure there's no trailing .gz on the url
ReWriteCond %{REQUEST_FILENAME} !^.+\.gz$
#check to see if a .gz version of the file exists.
RewriteCond %{REQUEST_FILENAME}.gz -f
#All conditions met so add .gz to URL filename (invisibly)
RewriteRule ^(.+) $1.gz [QSA,L]

Credit: opensourcetutor.com

I’m not sure it’s still necessary to exclude Safari.

For added benefit, minify the CSS and JavaScript files before gzipping them. Google’s excellent Page Speed Firefox/Firebug Add-on makes this very easy. Yahoo’s YUI Compressor is also quite good.

Verify that your content is being compressed

Use the nifty Web Page Content Compression Verification tool at http://www.whatsmyip.org/http_compression/ to confirm that your server is sending the compressed files.

Speed up page load times for returning visitors

Compression is only part of the story. In order to further speed page load times for your returning visitors, you will want to send the correct headers to leverage browser caching.

Update 5.5.11: I’ve written a better macro that doesn’t require a separate batch file and registry merge file. Please check out the new post at:

Programmatically re-enabling Word COM add-ins

A few months ago, I wrote a post on fixing Word 2007 add-in issues with a registry merge. In this post, I’ll take that idea a little further and explain how to automatically detect and fix add-ins through the use of a macro that runs each time Word is opened and a batch file that runs the registry merge file. All the end-user needs to do to repair the missing functionality is close and reopen Word.

The idea is that, in a corporate environment, there are certain important add-ins that must be running in order for Word to work normally. A good example would be an add-in that integrates Word with a document management system. Should that integration be lost because the add-in failed to load, data may be lost. Because there is no way to force Word to load certain add-ins, and there is no built-in function in Word for warning users when critically important don’t load, I decided to come up with a method for alerting the user to the problem and then fixing it with as little inconvenience as possible.

The example code in this post assumes the workstation is running Office 2007 on Windows XP (32-bit). I would think that the method could be adapted to other environments (Windows 7, Office 2010) without too much trouble. I’ve tried to note where differences come up on Windows 7 and 64-bit operating systems.

The process has four components:

  • an autoexec Word 2007 macro that runs each time Word is opened
  • a batch file that runs the registry merge file and writes an entry to a log file
  • the registry merge file that contains the correct LoadBehavior settings for the add-ins
  • a text file that acts as a log

The macro can be added to Normal.dotm or saved to a new .dotm file placed in the startup directory. The .bat batch file, .reg registry file, and .txt log file can be put anywhere, but in this example, they will be saved to a new folder C:\Word Add-ins fix\.

In the code examples below, I’ll be using the Acrobat PDFMaker Office COM Addin as the add-in that must always be loaded. This plugin is installed with Acrobat versions 8.1 and above and adds an Acrobat tab to the ribbon.

The macro

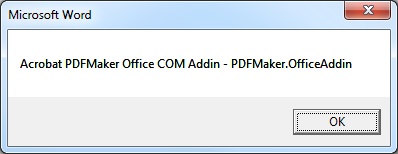
The first thing to do is to collect some information on the COM add-ins that are currently installed. Microsoft Support provides a simple macro for listing all of the COM add-ins at Some COM add-ins are not listed in the COM Add-Ins dialog box in Word. I recommend using this macro to identify the ProgID of your add-ins. The text to the left of the hyphen is the add-in’s Description and the text to the right of the hyphen is the ProgID.

Running the macro from the Microsoft site shows us that the ProgID for the Acrobat PDFMaker Office COM Addin is PDFMaker.OfficeAddin.

In Microsoft jargon, an add-in with a LoadBehavior of 3 is ‘Connected’. The COMAddIn object has a property called Connect that will be True if the add-in is Connected and False if it is not. The macro first checks the Connect property of each add-in and writes the ProgID of each Connected add-in to a string. It then checks to see if the string contains a match for each of the required add-ins. If the required add-in does not exist in the string, the macro will display a message to the user and fire the batch file to reset the LoadBehavior. It also passes the names of any not connected add-ins to the batch file as a parameter, so that information can be logged.

I found this article from MSDN on the COMAddIn object very helpful.

Sub AutoExec()
'
' FindMissingAddins Macro
' Display a message box with any critical but not 'Connected' COM add-ins
'

   Dim msg As String
   
   Dim MyAddin As COMAddIn
   Dim i As Integer, stringOfAddins As String
   
   For Each MyAddin In Application.COMAddIns
      If MyAddin.Connect = True Then
          stringOfAddins = stringOfAddins & MyAddin.ProgID & " - "
      End If
   Next
   
' Update the number of elements in the array
' Example: change to "requiredAddIns(0 To 4)" if you were checking 5 total add-ins)
   Dim requiredAddIns(0 To 0) As String
   
' Add each required AddIn to the array
   requiredAddIns(0) = "PDFMaker.OfficeAddin"
'   requiredAddIns(1) = ""
'   requiredAddIns(2) = ""
'   requiredAddIns(3) = ""
'   requiredAddIns(4) = ""
   
   For Each requiredAddIn In requiredAddIns
      If InStr(stringOfAddins, requiredAddIn) Then
         msg = msg
      Else
         msg = msg & requiredAddIn & vbCrLf
         listOfDisconnectedAddins = requiredAddIn & " " & listOfDisconnectedAddins
         listOfDisconnectedAddins = Trim(listOfDisconnectedAddins)
      End If
   Next
   
   If msg = "" Then
   Else
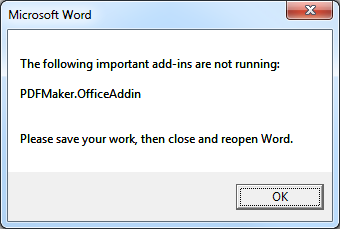
        MsgBox "The following important add-ins are not running: " & vbCrLf & vbCrLf & msg & vbCrLf & vbCrLf & "Please save your work, then close and reopen Word."
' Run a batch file that corrects the add-in problems in the registry and pass the list of unconnected add-ins as an argument
        Shell """C:\Word Add-ins fix\fixWordAddins.bat"" """ & listOfDisconnectedAddins & """"
   End If
   
End Sub

Edit the macro to fit your environment. You will need to specify each required add-in’s ProgID in the requiredAddIns array and update the number of add-ins in the array’s definition. The macro needs to be named AutoExec in order to run when Word starts.

This is the message that the user will receive if the macro finds that a required add-in is not Connected.

Clicking OK runs the batch file and closes the window.

The batch file

The batch file is called by the macro when any of the add-ins are not registered and currently connected. The batch file references the .reg file that contains the correct LoadBehavior settings and writes an event to the log with information on the username, the machine name, the datetime that the problem was discovered and which add-in(s) were not connected.

Copy the code and save it as fixWordAddins.bat to the C:\Word Add-ins fix\ directory or wherever you want.

:: A batch file for running a registry merge to set the LoadBehavior for Word add-ins
::
@echo off

REGEDIT /S "C:\Word Add-ins fix\fixWordAddins.reg"

:: Let's create a little log file and output which user ran the script and at what date and time
:: Set some variables for the date. US format - not localized!
@For /F "tokens=2,3,4 delims=/ " %%A in ('Date /t') do @( 
	Set Month=%%A
	Set Day=%%B
	Set Year=%%C
)

:: Set some variables for the time.
@For /F "tokens=1,2,3 delims=/: " %%A in ('Time /t') do @( 
	Set Hours=%%A
	Set Minutes=%%B
	Set Meridiem=%%C
)

:: Output to a log file
@echo %username% at %computername% on %Month%/%Day%/%Year% at %Hours%:%Minutes% %Meridiem% (%1) >> "C:\Word Add-ins fix\log.txt"

The registry merge

Add-ins can be ‘hard-disabled’ or ‘soft-disabled’ by Word 2007. Please see my post at fixing Word 2007 add-in issues with a registry merge for more information about what this means. The following registry merge will address both issues.

The registry merge will have to be edited for your environment, too. First, find the LoadBehavior value in the the registry for each of your add-ins in either of two locations:
HKEY_LOCAL_MACHINE\SOFTWARE\Microsoft\Office\Word\Addins\
HKEY_CURRENT_USER\Software\Microsoft\Office\Word\Addins\

If you don’t find your add-in in either of those locations, search the registry for the ProgID.

A LoadBehavior of 3 = loaded (this corresponds to a checked box in Word Options/Add-Ins)
A LoadBehavior of 2 = not loaded (this corresponds to an unchecked box in Word Options/Add-Ins)

The only add-ins that you need to worry about here are those that you want to always run (those that normally have a LoadBehavior of 3). Export those keys and add them to the .reg file.

Copy the code and save it as fixWordAddins.reg to the C:\Word Add-ins fix\ directory or wherever you want. Edit it for the add-ins you wish to load.

Windows Registry Editor Version 5.00

[-HKEY_CURRENT_USER\Software\Microsoft\Office\12.0\Word\Resiliency]

[-HKEY_LOCAL_MACHINE\SOFTWARE\Microsoft\Office\12.0\Word\Resiliency]

[HKEY_LOCAL_MACHINE\SOFTWARE\Microsoft\Office\Word\Addins\PDFMaker.OfficeAddin]
"LoadBehavior"=dword:00000003

On 64-bit versions of Windows, the add-ins can be found in:
HKEY_LOCAL_MACHINE\SOFTWARE\Wow6432Node\Microsoft\Office\Word\Addins\

The log file

If the log file doesn’t already exist, the batch file will create it. Each time the batch file runs, it adds a line to the end of the log file.

An entry will look something like this:

USERNAME at MACHINENAME on 06/17/2010 at 01:02 PM ("PDFMaker.OfficeAddin")

Caveats

The macros in a *.dotm can’t be edited if that template was opened from the startup location. Open a copy in another location, make your changes and save, and then overwrite the version in the startup location.

Windows 7

Note that in Windows 7, the UAC needs your permission to run a .bat file.

The Word startup location in Windows 7 (put any custom *.dotm files here):
\AppData\Roaming\Microsoft\Word\STARTUP

The default location of Normal.dotm in Windows 7:
\AppData\Roaming\Microsoft\Templates

I’m often given copy for web sites as Word documents. As one would expect, these documents contain all sorts of symbols that should be converted to entities before they can be used in a web page.

For example, ‘smart quotes’ (curly quotes), trademark and registered symbols, em-dashes, and other symbols look great, but can cause problems if you just drop them into a page and don’t use the corresponding character encoding.

Rather than do a global find-and-replace in my HTML editor, I’ve written a few Word macros that replace these symbols.

The first macro, CleanupHTML, replaces smart quotes with straight quotes. The second macro, PrettyHTML, replaces smart quotes with the correct pretty quote, ala .

At some point, I want to extend the macro to replace accented characters, such as è, and also to wrap bold and italics in strong and em tags. Ideally, I’d also find a way of converting lists in Word to straight text wrapped in unordered list items, as lists seem to require the most cleanup when copying and pasting.

Sub CleanupHTML()
'
' CleanupHTML Macro
' Cleanup document for HTML by replacing special characters with entities.
'
    Selection.Find.ClearFormatting
    Selection.Find.Replacement.ClearFormatting
    With Selection.Find
        .Text = "&"
        .Replacement.Text = "&amp;"
        .Forward = True
        .Wrap = wdFindContinue
        .Format = False
        .MatchCase = False
        .MatchWholeWord = False
        .MatchWildcards = False
        .MatchSoundsLike = False
        .MatchAllWordForms = False
    End With
    Selection.Find.Execute Replace:=wdReplaceAll
    Selection.Find.ClearFormatting
    Selection.Find.Replacement.ClearFormatting
    With Selection.Find
        .Text = "©"
        .Replacement.Text = "&copy;"
        .Forward = True
        .Wrap = wdFindContinue
        .Format = False
        .MatchCase = False
        .MatchWholeWord = False
        .MatchWildcards = False
        .MatchSoundsLike = False
        .MatchAllWordForms = False
    End With
    Selection.Find.Execute Replace:=wdReplaceAll
    Selection.Find.ClearFormatting
    Selection.Find.Replacement.ClearFormatting
    With Selection.Find
        .Text = "®"
        .Replacement.Text = "&reg;"
        .Forward = True
        .Wrap = wdFindContinue
        .Format = False
        .MatchCase = False
        .MatchWholeWord = False
        .MatchWildcards = False
        .MatchSoundsLike = False
        .MatchAllWordForms = False
    End With
    Selection.Find.Execute Replace:=wdReplaceAll
    Selection.Find.ClearFormatting
    Selection.Find.Replacement.ClearFormatting
    With Selection.Find
        .Text = "™"
        .Replacement.Text = "&#8482;"
        .Forward = True
        .Wrap = wdFindContinue
        .Format = False
        .MatchCase = False
        .MatchWholeWord = False
        .MatchWildcards = False
        .MatchSoundsLike = False
        .MatchAllWordForms = False
    End With
    Selection.Find.Execute Replace:=wdReplaceAll
    Selection.Find.ClearFormatting
    Selection.Find.Replacement.ClearFormatting
    With Selection.Find
        .Text = "--"
        .Replacement.Text = "&#8212;"
        .Forward = True
        .Wrap = wdFindContinue
        .Format = False
        .MatchCase = False
        .MatchWholeWord = False
        .MatchWildcards = False
        .MatchSoundsLike = False
        .MatchAllWordForms = False
    End With
    Selection.Find.Execute Replace:=wdReplaceAll
    Selection.Find.ClearFormatting
    Selection.Find.Replacement.ClearFormatting
    With Selection.Find
        .Text = "—"
        .Replacement.Text = "&#8212;"
        .Forward = True
        .Wrap = wdFindContinue
        .Format = False
        .MatchCase = False
        .MatchWholeWord = False
        .MatchWildcards = False
        .MatchSoundsLike = False
        .MatchAllWordForms = False
    End With
    Selection.Find.Execute Replace:=wdReplaceAll
    Selection.Find.ClearFormatting
    Selection.Find.Replacement.ClearFormatting
    With Selection.Find
        .Text = "–"
        .Replacement.Text = "&#8211;"
        .Forward = True
        .Wrap = wdFindContinue
        .Format = False
        .MatchCase = False
        .MatchWholeWord = False
        .MatchWildcards = False
        .MatchSoundsLike = False
        .MatchAllWordForms = False
    End With
    Selection.Find.Execute Replace:=wdReplaceAll
    Selection.Find.ClearFormatting
    Selection.Find.Replacement.ClearFormatting
    With Selection.Find
        .Text = "…"
        .Replacement.Text = "..."
        .Forward = True
        .Wrap = wdFindContinue
        .Format = False
        .MatchCase = False
        .MatchWholeWord = False
        .MatchWildcards = False
        .MatchSoundsLike = False
        .MatchAllWordForms = False
    End With
    Selection.Find.Execute Replace:=wdReplaceAll
    Selection.Find.ClearFormatting
    Selection.Find.Replacement.ClearFormatting
    With Selection.Find
        .Text = "'"
        .Replacement.Text = "'"
        .Forward = True
        .Wrap = wdFindContinue
        .Format = False
        .MatchCase = False
        .MatchWholeWord = False
        .MatchWildcards = False
        .MatchSoundsLike = False
        .MatchAllWordForms = False
    End With
    Selection.Find.Execute Replace:=wdReplaceAll
    With Selection.Find
        .Text = """"
        .Replacement.Text = """"
        .Forward = True
        .Wrap = wdFindContinue
        .Format = False
        .MatchCase = False
        .MatchWholeWord = False
        .MatchWildcards = False
        .MatchSoundsLike = False
        .MatchAllWordForms = False
    End With
    Selection.Find.Execute Replace:=wdReplaceAll
End Sub

Sub PrettyHTML()
'
' PrettyHTML Macro
'
'
    Selection.Find.ClearFormatting
    Selection.Find.Replacement.ClearFormatting
    With Selection.Find
        .Text = "&"
        .Replacement.Text = "&amp;"
        .Forward = True
        .Wrap = wdFindContinue
        .Format = False
        .MatchCase = False
        .MatchWholeWord = False
        .MatchWildcards = False
        .MatchSoundsLike = False
        .MatchAllWordForms = False
    End With
    Selection.Find.Execute Replace:=wdReplaceAll
    Selection.Find.ClearFormatting
    Selection.Find.Replacement.ClearFormatting
    With Selection.Find
        .Text = "©"
        .Replacement.Text = "&copy;"
        .Forward = True
        .Wrap = wdFindContinue
        .Format = False
        .MatchCase = False
        .MatchWholeWord = False
        .MatchWildcards = False
        .MatchSoundsLike = False
        .MatchAllWordForms = False
    End With
    Selection.Find.Execute Replace:=wdReplaceAll
    Selection.Find.ClearFormatting
    Selection.Find.Replacement.ClearFormatting
    With Selection.Find
        .Text = "®"
        .Replacement.Text = "&reg;"
        .Forward = True
        .Wrap = wdFindContinue
        .Format = False
        .MatchCase = False
        .MatchWholeWord = False
        .MatchWildcards = False
        .MatchSoundsLike = False
        .MatchAllWordForms = False
    End With
    Selection.Find.Execute Replace:=wdReplaceAll
    Selection.Find.ClearFormatting
    Selection.Find.Replacement.ClearFormatting
    With Selection.Find
        .Text = "™"
        .Replacement.Text = "&#8482;"
        .Forward = True
        .Wrap = wdFindContinue
        .Format = False
        .MatchCase = False
        .MatchWholeWord = False
        .MatchWildcards = False
        .MatchSoundsLike = False
        .MatchAllWordForms = False
    End With
    Selection.Find.Execute Replace:=wdReplaceAll
    Selection.Find.ClearFormatting
    Selection.Find.Replacement.ClearFormatting
    With Selection.Find
        .Text = "--"
        .Replacement.Text = "&#8212;"
        .Forward = True
        .Wrap = wdFindContinue
        .Format = False
        .MatchCase = False
        .MatchWholeWord = False
        .MatchWildcards = False
        .MatchSoundsLike = False
        .MatchAllWordForms = False
    End With
    Selection.Find.Execute Replace:=wdReplaceAll
    Selection.Find.ClearFormatting
    Selection.Find.Replacement.ClearFormatting
    With Selection.Find
        .Text = "—"
        .Replacement.Text = "&#8212;"
        .Forward = True
        .Wrap = wdFindContinue
        .Format = False
        .MatchCase = False
        .MatchWholeWord = False
        .MatchWildcards = False
        .MatchSoundsLike = False
        .MatchAllWordForms = False
    End With
    Selection.Find.Execute Replace:=wdReplaceAll
    Selection.Find.ClearFormatting
    Selection.Find.Replacement.ClearFormatting
    With Selection.Find
        .Text = "–"
        .Replacement.Text = "&#8211;"
        .Forward = True
        .Wrap = wdFindContinue
        .Format = False
        .MatchCase = False
        .MatchWholeWord = False
        .MatchWildcards = False
        .MatchSoundsLike = False
        .MatchAllWordForms = False
    End With
    Selection.Find.Execute Replace:=wdReplaceAll
    Selection.Find.ClearFormatting
    Selection.Find.Replacement.ClearFormatting
    With Selection.Find
        .Text = "…"
        .Replacement.Text = "..."
        .Forward = True
        .Wrap = wdFindContinue
        .Format = False
        .MatchCase = False
        .MatchWholeWord = False
        .MatchWildcards = False
        .MatchSoundsLike = False
        .MatchAllWordForms = False
    End With
    Selection.Find.ClearFormatting
    Selection.Find.Replacement.ClearFormatting
    With Selection.Find
        .Text = ChrW(8220)
        .Replacement.Text = "&ldquo;"
        .Forward = True
        .Wrap = wdFindContinue
        .Format = False
        .MatchCase = False
        .MatchWholeWord = False
        .MatchWildcards = False
        .MatchSoundsLike = False
        .MatchAllWordForms = False
    End With
    Selection.Find.Execute Replace:=wdReplaceAll
    Selection.Find.ClearFormatting
    Selection.Find.Replacement.ClearFormatting
    With Selection.Find
        .Text = ChrW(8221)
        .Replacement.Text = "&rdquo;"
        .Forward = True
        .Wrap = wdFindContinue
        .Format = False
        .MatchCase = False
        .MatchWholeWord = False
        .MatchWildcards = False
        .MatchSoundsLike = False
        .MatchAllWordForms = False
    End With
    Selection.Find.Execute Replace:=wdReplaceAll
    Selection.Find.ClearFormatting
    Selection.Find.Replacement.ClearFormatting
    With Selection.Find
        .Text = "'"
        .Replacement.Text = "&rsquo;"
        .Forward = True
        .Wrap = wdFindContinue
        .Format = False
        .MatchCase = False
        .MatchWholeWord = False
        .MatchWildcards = False
        .MatchSoundsLike = False
        .MatchAllWordForms = False
    End With
    Selection.Find.Execute Replace:=wdReplaceAll
    Selection.Find.ClearFormatting
    Selection.Find.Replacement.ClearFormatting
    With Selection.Find
        .Text = "è"
        .Replacement.Text = "&egrave;"
        .Forward = True
        .Wrap = wdFindContinue
        .Format = False
        .MatchCase = False
        .MatchWholeWord = False
        .MatchWildcards = False
        .MatchSoundsLike = False
        .MatchAllWordForms = False
    End With
    Selection.Find.Execute Replace:=wdReplaceAll
    Selection.Find.ClearFormatting
    Selection.Find.Replacement.ClearFormatting
End Sub

Many thanks to
http://celebritycola.blogspot.com/2004/09/preserving-formatting-when-posting.html for getting me started on this.

For a new project, I needed to combine two or more associative arrays and sum the values of any keys that exist in common. I was a little surprised to find that there wasn’t a built-in function to do this in PHP. So I wrote my own. It can accept any number of arrays as arguments, and goes through each array one key at a time, comparing the keys to those in an output array. Where the keys match, the values are summed. If the key does not exist in the output array, it’s appended to it.

The function returns an array that contains all of the unique keys in the input arrays.

If anyone has any ideas about how to optimize this, please post a comment. One thought would be to use the first array as the output array, avoiding the key-by-key comparison of the first array against an empty array.

function array_mesh() {
	// Combine multiple associative arrays and sum the values for any common keys
	// The function can accept any number of arrays as arguments
	// The values must be numeric or the summed value will be 0
	
	// Get the number of arguments being passed
	$numargs = func_num_args();
	
	// Save the arguments to an array
	$arg_list = func_get_args();
	
	// Create an array to hold the combined data
	$out = array();

	// Loop through each of the arguments
	for ($i = 0; $i < $numargs; $i++) {
		$in = $arg_list[$i]; // This will be equal to each array passed as an argument

		// Loop through each of the arrays passed as arguments
		foreach($in as $key => $value) {
			// If the same key exists in the $out array
			if(array_key_exists($key, $out)) {
				// Sum the values of the common key
				$sum = $in[$key] + $out[$key];
				// Add the key => value pair to array $out
				$out[$key] = $sum;
			}else{
				// Add to $out any key => value pairs in the $in array that did not have a match in $out
				$out[$key] = $in[$key];
			}
		}
	}
	
	return $out;
}

If you want to test it out, here’s some additional code.

$a = array('abc' => '100.000', 'def' => '50', 'ghi' => '25', 'xyz' => '10');
$b = array('abc' => '100.333', 'def' => '75', 'ghi' => '50', 'jkl' => '25');
$c = array('abc' => '100.111', 'def' => '75', 'ghi' => '50', 'uvw' => '5');

echo "<pre>";
print_r(array_mesh($a, $b, $c));
echo "</pre>";

I hope you find it helpful.

A friend who does a lot of selling on eBay asked me to develop a web application for generating HTML templates that could be copied and pasted into his auctions. He wanted to be able to add a title, a description, and some terms and conditions, and also to be able to upload images so the auction template would display thumbnails that could be clicked to display full-sized versions in a new window or tab. The more we talked, the more it sounded like something that would be both useful for a good number of people, and potentially a source of ad revenue for us. And so was born Simple Auction Wizard, an online HTML template generator for auction websites like eBay.

I was looking for just this kind of a project because I wanted a reason to play with TinyMCE, an Open Source, platform independent, web-based JavaScript HTML WYSIWYG editor control, and SWFUpload, a small JavaScript/Flash library that does very neat things with file uploads.

The most difficult part was actually getting the templates to look good in a variety of browsers. Because the template HTML appears inside of a larger page, I couldn’t rely on Doctype switching to place IE into standards mode. This meant the templates would have to be developed so that they would look approximately the same in standards-compliant browsers like Firefox, Chrome, and Safari, as well as horrible browsers like IE6 in quirks-mode. I tried very hard to minimize the use of tables, but they eventually crept in. I was able to use CSS, for the most part, though if any more issues come up, I’m going to throw in the towel and just do inline styles.

The web app is open to the public, but realize that it’s very early in its development and I intend to continue making changes.

A little over a year ago, I wrote a post about a PHP script I had created for protecting a download using a unique URL. The post turned out to be pretty popular, and many of the comments included requests to extend the script in useful ways. So, I’ve finally gotten around to updating the script to generate multiple URLs (up to 20) at a time, to allow different files to be associated with different keys, and to allow brief notes to be attached to the download key.

I’ve also added a simple page that prints out a list of all of the keys generated the date and time that each key was created, the filename of the download on the server that the key accesses, the number of times the key was used, and any attached note. This should make it easier to generate gobs of keys, drop them into an Excel spreadsheet, and help the files’ owner keep track of who’s getting which file, and how often.

The scripts themselves are a little more involved this time around, but the general idea is the same. A unique key is generated and combined with a URL that allows access to a single file on the server. Share the URL/key instead of the URL to the file itself to allow a visitor to download the file, but not to know the location of the file. The key will be valid for a certain length of time and number of downloads, and will stop working once the first limiting condition is met. This should prevent unauthorized downloading due to people sharing the keys.

How it works

There are six main components to this system:

  1. the MySQL database that holds each key, the key creation date and time, the maximum age of the key, the number of times the key has been used, the maximum times the key may be used, the file associated with the key, and the note attached to the key, if any
  2. a generatekey.php page that generates the keys and outputs the corresponding unique URLs
  3. a download.php page that accepts the key, checks its validity, and either initiates the download or rejects the key as invalid
  4. a report.php page that returns all of the data in the database
  5. a config.php file that contains variables such as number of downloads allowed, the maximum allowable age of the key, and the filenames of the downloads, along with the database connection information
  6. the .zip file(s) to be protected

The files

The files, along with two example downloads, are available for download as a .zip file.

Download the protecting multiple downloads PHP script

The MySQL database

Using whatever method you’re comfortable with, create a new MySQL database named “download” and add the following table:

CREATE TABLE `downloadkeys` (
  `uniqueid` varchar(12) NOT NULL default '',
  `timestamp` INT UNSIGNED,
  `lifetime` INT UNSIGNED,
  `maxdownloads` SMALLINT UNSIGNED, 
  `downloads` SMALLINT UNSIGNED default '0',
  `filename` varchar(60) NOT NULL default '',
  `note` varchar(255) NOT NULL default '',
  PRIMARY KEY (uniqueid)
);

How to use the scripts

The scripts require a little setup before they’re ready to be used, so open config.php in your text editor of choice.

Change the values for $db_host, $db_username, $db_password, $db_name to point to your database.

Set the variable $maxdownloads equal to the maximum number of downloads (actually, the number of page loads).

Set the variable $lifetime equal to the keys’ viable duration in seconds (86400 seconds = 24 hours).

Set the variable $realfilenames to the real names of actual download files on the server as a comma-separated list (this is optional; you can also use a single filename or just leave it as empty double-quotes: “”). If you have more than one file to protect, enter the names as a comma-separated list and the script will create a drop-down menu as the Filename field. If you leave the variable blank, the form will display an empty input box as the Filename field.

Set the variable $fakefilename to anything – this is what the visitor’s file will be named when the download is initiated.

I would strongly recommend renaming generatekey.php, as anyone who can view it will be able to create unlimited numbers of keys, and worse, they’ll be able to see the filenames (if you set them in config.php). I would also recommend that the directory you put these files into, and each directory on your site (/images, /css, /js, etc.), contain an index.html file. This is a simple security measure that will prevent visitors from snooping around a directory and viewing its contents (though access to the directory contents is usually prohibited by a setting on the server).

Place all the PHP scripts and your .zip file(s) into the same directory on your server.

That’s all there is to it. Whenever you want to give someone access to the download, visit the generatekey.php page and fill out the form. It will generate a key code, save it to a database, and print out a unique link that you can copy and paste into an email or whatever. The page that the unique link points to checks to see if the key code is legitimate, then checks to see if the code is less than X hours old, then checks to see if it has been used less than X times. The visitor will get a descriptive message for the first unmet condition and the script will terminate. If all three conditions are met, the download starts automatically.

Errors and issues

Note: The download will not initiate automatically, and will actually be output as text on the page, if the download.php page is changed to send headers or any output to the browser. Be careful when making modifications or incorporating this script into another page.

Check the HTTP headers (Google for an online service that does this, or install the LiveHTTPHeaders Firefox plugin) of the download link. If the script is working correctly, you should see Content-Transfer-Encoding: binary and Content-Type: application/octet-stream in the headers. If you’re getting a page of text instead of the zip file, you’ll probably see Content-Type: text/html.

Example HTTP headers for a correctly working download

If the script is working correctly, the HTTP headers will look something like this:

HTTP/1.1 200 OK
Date: Sun, 20 Jun 2010 13:31:50 GMT
Server: Apache
Cache-Control: must-revalidate, post-check=0, pre-check=0, private
Content-Disposition: attachment; filename="bogus_download_name.zip"
Content-Transfer-Encoding: binary
Pragma: public
Content-Length: 132
Keep-Alive: timeout=15, max=100
Connection: Keep-Alive
Content-Type: application/octet-stream

I’ve finally opened a Twitter account, so you can follow me at http://twitter.com/ardamis. As a social experiment, it’s interesting to watch and discuss, but I haven’t really participated much. On the other hand, I’m very interested in the phenomenon of URL shortening. So, without too much trouble, I put together yet another URL shortening service: Minifi.de (‘minified’, in the jargon). It does pretty much the same thing as tinyurl.com, bit.ly and is.gd – you enter a long URL and it returns a shorter one. I’m about 50% done with the API (it works, so long as the URL valid), so if anyone knows of any clients that allow the user to specify a shortening service, I’d like to test that functionality. I have plans to make it account-based, so that you can track usage statistics and such, but that will only happen after I’m confident that the thing will survive in the wild.

So, feel free to give it a whirl, but know that it’s still in development and that I’ll probably have to wipe the database a few more times before I get it just right.

Well, I’ve been sitting on this adaptation of my Broadway Plogger theme for too long. It hasn’t been fully tested, but it seems to work. It’s a dark theme that uses the popular Lightbox 2 JavaScript script to open medium-sized images over the thumbnails page. This means that there is no getting to the full-sized image.

Plogger 3 theme: Broadway screenshot

Anyway, if you’ve been looking for a Lightbox 2 supporting Plogger theme, please give this one a try.

Download the “Broadway 2 + Lightbox” Plogger theme

Update 12/19/09: I’ve updated the theme to be compatible with the recently-released Plogger v.1.0. If you’re running an earlier version, I would recommend that you update to the current stable release.