I like using the Import Pictures and Videos wizard in Windows 7 when transferring pictures from my digital camera because it can create a separate folder for each date. But it lacks the ability to rename the individual files based on date. I want my image filenames to be YYYY.MM.DD_001.jpg, where the trailing number increments for that date.
To get the filename just right, I use Advanced Renamer, a free program for renaming multiple files or folders at once. Advanced Renamer can read information from the image file (like the date the picture was taken).
Importing the images
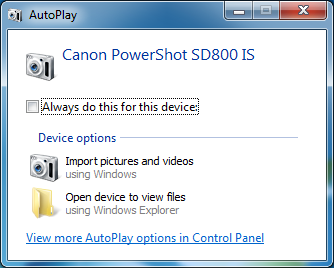
Connect the device or memory card to your computer. In the AutoPlay dialog box that appears, click Import pictures and videos using Windows.
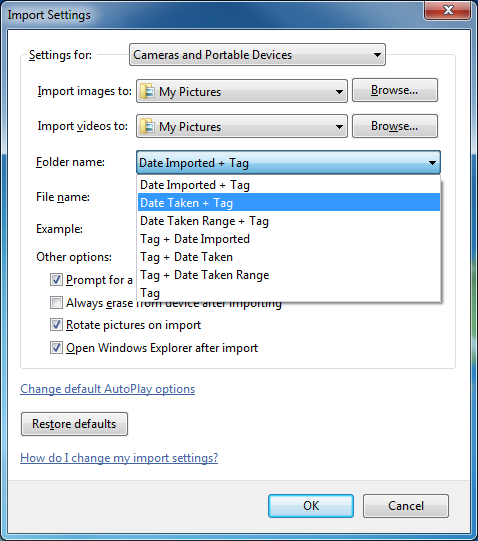
The default settings will create a single folder with today’s date, which is not what we want. To change the settings that are used when importing pictures and videos, click Import settings in the Import Pictures and Videos dialog box.
Under the Folder name menu, choose Date Taken + Tag and click OK. The import process will restart and you’ll be prompted to enter a tag. The tag isn’t important, so just click Import.
Configuring Advanced Renamer
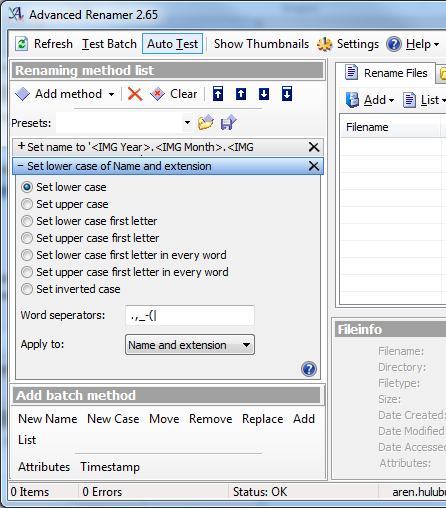
It takes two methods to get the names the way I want them. The first method changes the filename to use the year, month, and day information, and increment a trailing number. The second method changes the new filename to lowercase. If you prefer your file extensions to be in uppercase, you can skip the second method.
Under Add batch method, click New Name, and either select the desired date conventions from the options, adding any separator characters you wish, or copy the code below to use YYYY.MM.DD_001.EXT.
<IMG Year>.<IMG Month>.<IMG Day>_<Inc NrDir:001>.<Ext>
Under Add batch method, click New Case and then choose Set lower case. In the Apply to menu, choose Name and extension.
Click the Add button and browse to the parent folder. The files should appear in the list, and the new filename will be displayed. Check for any errors or problems with the filename, then click Start Batch.
Move the files into a single directory
Now that the pictures are all correctly named, I no longer need them to be in date-based folders. It’s more convenient to have them in a single folder from which I can organize them.
To do this, I use a batch file that moves any files in a sub-folder into the parent folder.
Set sOriginFolder="PATH\TO\PARENT\DIRECTORY"

For /f "Tokens=*" %%a in ('Dir %sOriginFolder% /a-d /s /b') do (
	move "%%a" %sOriginFolder%
)
Replace PATH\TO\PARENT\DIRECTORY with the full path to the parent folder, then run the batch file.
That’s it. Now I have a single folder of images that are uniquely named according to date taken.


