This post was originally written in October, 2012, and has been updated twice – first in January, 2013, while using “2012-12-16-wheezy-raspbian” and then again in February, 2014, while using “2014-01-07-wheezy-raspbian” – in all cases using the latest Raspbian release at the time and the latest versions of Emulation Station, RetroArch, and other software mentioned below. So, if you encounter instructions that don’t exactly jive with what you’re seeing, it’s probably because the software continues to change and my instructions have fallen out-of-date. If you get confused, please leave me a comment and I’ll try to help.
After playing around aimlessly a bit with my Raspberry Pi in 2012 (most recently, an install of the very nice RaspBMC), I thought of a useful purpose for it while showing my kids Super Mario Bros. and The Legend of Zelda running on the VirtualNES emulator on my Windows laptop. Before they get too spoiled on the Xbox 360’s graphics and sound, I want to get them some exposure to a few of the simple but influential 8-bit games from my childhood. At the same time, I don’t want my laptop to become the family’s gaming machine. We have a pretty massive TV and plenty of Xbox 360 controllers, so I figured I could throw the Raspberry Pi into the mix and come out with a neat retro gaming console.
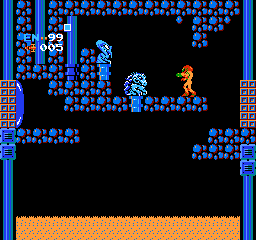
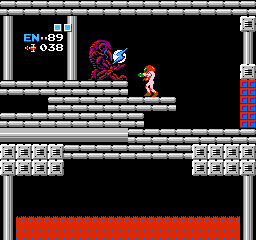
Metroid running on my Raspberry Pi
As with all things Linux, the devil is in the details. Like, can you get the application to work with both video and sound, and are all of the peripherals fully functional? Add to that the uncertainty of the performance of Linux applications on the particular hardware limitations of the Raspberry Pi, and any simple-seeming project quickly develops into a series of hair-pulling and-now-this-doesn’t-work type obstacles. Case in point, a Google search as I began the project in October, 2012, turned up a number of people who had already thought of turning their Raspberry Pi’s into 80’s game console emulators, and it quickly became obvious that this wasn’t going to be a completely painless process.
This post on the Raspberry Pi forum from a few months earlier basically summed it up.
I have a NES emulator working without sound, using the Debian image, will only work running through console no LXDE
sudo apt-get install fceu
cd /usr/games
./fceu -input1 gamepad -inputcfg gamepad1 /home/pi/mario_bros.zip
Command above will map gamepad buttons to your keyboard, and load game image path you specify. Appears to work fine apart from no sound, I’ve had a few levels on Mario Bros.
Not tried with a joypad, I have a wireless xbox360 joypad that is discovered as a usb device, but have not had chance to try to get it working yet. It doesn’t work by default
http://www.raspberrypi.org/phpBB3/viewtopic.php?f=2&t=5874
Yikes! Emulation with no sound and keyboard-only input is considered a success! And then a reply to that already discouraging post makes the landscape seem even more bleak.
Oh yeah, that’s the one! I tried to use mednafen, but even disabling openGL so it would use SDL for graphics would only give me a blank screen. I’ve tried to find some console emulators that use openGLES but every time I find one, it turns out that it’s only available as a pre-assembled package for platform x.
http://www.raspberrypi.org/phpBB3/viewtopic.php?f=2&t=5874
Well, posts like those from people who certainly seem pretty well informed about console emulation would certainly dissuade most human beings from settling on this as a weekend project. But thankfully for us, plenty of people far smarter than I have been diligently working at converting their Raspberry Pi’s into something resembling a game console, and you and I can now directly benefit from their labor. I’m happy to report that I am getting decently playable NES emulation with sound (and slightly-less-satisfactory SNES emulation) from my Raspberry Pi after a few hours of struggle. And what with how quickly I’m willing to reformat the SD card with a different image (what? an update to RaspBMC?), I thought I should document my steps for posterity.
One of the most frustrating things about doing anything in Linux after living in Windows is that it rarely works as smoothly as you would expect and it takes some patience to get past the hurdles. On top of that, when you turn to Google for help, forum threads typically assume the readers will have more than a passing familiarity with the Linux file structure, command line input, Make files, and the like. Once I eventually track down something that looks like a possible fix, I often find myself searching for help on just exactly how to implement the fix, which advice frequently turns out to be out-of-date and no longer applicable.
So, for those of us who are not going to know how to chmod +x a shell script without some hand-holding, here are the steps I’ve followed so far, that are hopefully detailed enough that you end up with a working RPi game console instead of a smashed bit of PCB and some seething frustration. At times, I assume that you’re still using the ‘pi’ user account, but if you’re not, you’ll probably be able to recognize where you need to substitute your new account. If you can see where I’m definitely doing stuff horribly wrong, please leave a comment and I’ll try to make it better.
Learning a few new tricks here
Steps to set up the SD card and configure Raspbian with the necessary software
1. On your main computer (I’ll go out on a limb and assume you’re running Windows here), get the latest release of Rasbian from the Raspberry Pi Downloads page, extract the image file, format your (4 GB or larger) SD card using SD Formatter 4.0 and write the Raspbian disk image to your SD card using win32diskimager. I’ve used win32diskimager successfully more than once, but it will complain at me every time.
Connect the Raspberry Pi to a TV or monitor (I greatly prefer the HDMI out, but the composite output is fine if that’s all you have), connect a USB keyboard (my superstitious nature makes me connect it to the bottom USB port), and connect an Ethernet cable to your router because 1) the Raspberry Pi will need Internet access during setup and 2) your life will be easier if the Raspberry Pi can also talk with a computer on your home network. You can also connect your wired Xbox controller or Xbox 360 Wireless Gaming Receiver dongle thingie now, if you like. Power on the Raspberry Pi and use the spacebar, tab, arrow and enter keys to navigate through the raspi-config utility (it should run automatically at the first boot) to
- expand the root partition to fill the SD card
- change the internationalization options – language, timezone, and keyboard – as appropriate (this actually is important)
- enable the SSH server (in Advanced Options)
Choose finish and reboot the Raspberry Pi by typing the command:
sudo shutdown -r now
And then hitting Enter. Each time I specify a line of input, like the one above, hit the Enter key at the end to execute it.
After the Raspberry Pi restarts, write down its IP address, which is reported in the lines just before the login prompt.
I typically overclock my Raspberry Pi to the Modest setting (800MHz), but I don’t know if this makes any difference, so you can play with this to meet your needs. I run the original Model B board with 256 MB memory, and while it’s sometimes recommended to bump up the memory split to allocate 192 MB to the GPU, it hasn’t been necessary in my experience. If you need to run the raspi-config utility again to change any of these settings, open a terminal (Alt+F1 through Alt+F6) and enter
sudo raspi-config
I recommend against changing the setting that causes the Raspberry Pi to boot straight into the desktop, as the Emulation Station and RetroArch stuff that comes later is best launched from the terminal immediately after logging in (and not from a window within X) and offers something of a GUI anyway.
2. Back on the Windows computer, download PuTTY, which is an application that will allow you to access the command prompt on the RPi (RPi is easier to type, so I’ll be using this shorthand frequently) from your Windows computer across your home network. Launch PuTTY, connect to the RPi using its IP address, and log in (username: pi and password: raspberry). A great thing about accessing the RPi via PuTTY is that you can send command lines to the RPi by copying them from your favorite web browser in Windows and pasting them into the PuTTY window, saving you from typing in lots of unfamiliar and sometimes lengthy Linux commands.
3. In the PuTTY window, get Raspbian up-to-date by updating the package lists from the repositories and retrieving new versions of existing packages with
sudo apt-get update && sudo apt-get upgrade -y
4. Still in the PuTTY window, install GIT, vim, xboxdrv, and other useful software with
sudo apt-get install -y git vim dialog xboxdrv
Then reboot the RPi with
sudo shutdown -r now
5. Because the next part – installing RetroArch, the console emulators, and Emulation Station – takes a long time, I recommend either a) using the USB-connected keyboard on the RPi or b) using the screen command (here’s a good introduction to screen) if you are connecting to the RPi with PuTTY. I mention this because if your PuTTY session drops, the shell in which the commands are running will terminate and interrupt any running process. If this happens, you will have to run the setup script again (but you won’t necessarily know how far along it got before it terminated).
Whichever way you choose to connect, follow the instructions at RetroPie-Setup: An initialization script for RetroArch on the Raspberry Pi to install RetroArch for the Raspberry Pi. I would recommend using the source-code based installation, as it’s unclear how often the binaries are compiled. You can leave the options for installing components at their defaults, but I generally deselect the cores (the console emulators) that I don’t want or that I expect won’t work very well on the RPi. The installation may take hours, but the fewer emulator cores you choose to install, the faster it will go. Reboot at the end of the RetroArch installation.
6. The next step is to copy your ROMs into the appropriate, console-named subdirectory under /home/pi/RetroPie/roms/ on the RPi. There are a few different ways to do this. You can put them on a FAT-32 formatted USB flash drive and then transfer them to the RPi via command line, or you can launch the desktop with startx and drag-and-drop them, but I find that it’s much easier to use WinSCP to copy files from a Windows machine to the RPi across the network. (You can also use WinSCP to copy config files between the Raspberry Pi and your Windows machine, where you can edit them in a more familiar text editor. More on this later.)
Contrary to the advice below, at least for NES ROMs, both the .nes and .NES file extensions are acceptable. But if you’re having problems with ROMs for other systems, you may consider looking at the extensions.
Make sure that the extensions of your roms are lowercase and correspond to those given in /home/pi/.emulationstation/es_systems.cfg. You can show the content of that file with “cat /home/pi/.emulationstation/es_systems.cfg”.
http://www.raspberrypi.org/phpBB3/viewtopic.php?t=13600&p=155809
Note: In my experience, if you have chosen not to install most of the emulator cores, you will need to put at least one ROM in at least one console emulator’s ROMs directory in order for Emulation Station to start up successfully. I ran into a problem when I chose not to install any cores except for NES, and then tried to start Emulation Station for the first time before I copied any NES ROMs to the RPi. Instead of the Emulation Station starting up the gamepad configuration wizard, I got only a black screen with a small white dot in the center and spent hours thinking that something was wrong with Raspian/Emulation Station/Retroarch/the RPi itself, etc.
This dot is the “fake” SDL window ES uses to get input. Actual rendering is done through OpenGL ES. If all you see is this dot, then odds are something went wrong initializing the OpenGL ES surface. Are you sure you’re running at least the 192/64mb memory split?
https://github.com/petrockblog/RetroPie-Setup/wiki/EmulationStation
That takes care of the basics. Now you can launch the Emulation Station, which is the front-end we’ll be interacting with, to choose between different game systems and within them, different individual games, by logging into the RPi using the USB keyboard and entering
emulationstation
Emulation Station does not like to be started from an SSH connection. Manually starting Emulation Station each time is optional, as it is possible to launch the Emulation Station automatically at start up, though I use the RPi for a few different things so I don’t actually want this behavior at each boot and just launch it myself if I’m there to play a game.
The first time that you launch Emulation Station, it will guide you through setting up either a keyboard or controller for navigating between the various consoles and launching games. These settings are saved to a config file named es_input.cfg and located in the hidden directory at ~/.emulationstation/es_input.cfg. (Files and directories with names that begin with a dot are hidden, so they won’t show up with a regular ls command, but they will show up if you use ls -a and they are displayed by default in WinSCP.) If you ever want to go through the wizard again to set up a keyboard or controller, delete that file and launch Emulation Station.
If you want to modify es_input.cfg by hand, it’s easy enough to transfer it to your Windows computer using WinSCP and open it in a text editor. One advantage of editing the file is that you can run through the wizard twice – configuring a keyboard the first time and a controller the second – and create two es_input.cfg files that you then splice together in a text editor to create a single file so that you can navigate through Emulation Station by either the keyboard or the controller. This is what my es_input.cfg file looks like, with mostly intuitive controls for the keyboard and an Xbox 360 controller:
<?xml version="1.0"?>
<inputList>
	<inputConfig type="keyboard">
		<input name="a" type="key" id="13" value="1" />
		<input name="b" type="key" id="8" value="1" />
		<input name="down" type="key" id="274" value="1" />
		<input name="left" type="key" id="276" value="1" />
		<input name="menu" type="key" id="303" value="1" />
		<input name="pagedown" type="key" id="281" value="1" />
		<input name="pageup" type="key" id="280" value="1" />
		<input name="right" type="key" id="275" value="1" />
		<input name="select" type="key" id="32" value="1" />
		<input name="up" type="key" id="273" value="1" />
	</inputConfig>
	<inputConfig type="joystick" deviceName="Microsoft X-Box 360 pad">
		<input name="a" type="button" id="0" value="1" />
		<input name="b" type="button" id="1" value="1" />
		<input name="down" type="axis" id="1" value="1" />
		<input name="left" type="axis" id="0" value="-1" />
		<input name="menu" type="button" id="6" value="1" />
		<input name="pagedown" type="button" id="5" value="1" />
		<input name="pageup" type="button" id="4" value="1" />
		<input name="right" type="axis" id="0" value="1" />
		<input name="up" type="axis" id="1" value="-1" />
	</inputConfig>
</inputList>
You can compare the contents of my file to your own in order to get an idea of what buttons are mapped to stuff I’ve never actually used in Emulation Station, like the Page Up and Page Down commands.
Ridley is easy, like this tutorial
Your Raspberry Pi now has all the necessary software to emulate games and accept input from your Xbox 360 controller. It’s now time to…
Configure the controller for games
Once you have those components installed, it’s time for the next step in any Linux project: discover what’s not working. (I have a long, involved tale about the many futile hours I spent trying to map all of the buttons on my old Logitech MX510 mouse, but I digress…)
Back in 2012, a wired (and potentially wireless) Xbox 360 controller wouldn’t automatically work, and unless you were content using the keyboard in games, you wanted to get it working ASAP. You could connect the controller, and you might get the ring of lights to pulse, but you would need to crank up xboxdrv, a userspace driver for Xbox controllers, before you could do anything with it.
As of 2014, Xbox controller support is integrated into Emulation Station and RetroAarch, but if you are curious about how we did it in the good old days, I strongly recommend reading through the list of xboxdrv switches, particularly if something doesn’t work as expected or if you need to figure out why the triggers and analog sticks aren’t mapping.
Even though the controller and the RPi are talking, you need to configure RetroArch to work with it. It is certainly possible to do all the text file editing and copying by using the included Leafpad editor in LXDE, which is the graphical interface on the Raspbian distribution, or in your editor of choice on your Windows computer while transferring the files back and forth with WinSCP, as I normally do, but this is a rather geeky project so I feel that I should at least mention the text-only vim editor that you can run within a terminal, and so I’m going to use it briefly in this case. In the PuTTY window, enter the following code to create a back up copy of the default RetroArch configuration file that is used by all of the console emulators:
cp ~/RetroPie/configs/all/retroarch.cfg ~/RetroPie/configs/all/retroarch.cfg.bak
Then open the live file for editing in vim with:
vim ~/RetroPie/configs/all/retroarch.cfg
I think it’s good to get some idea of the many options within RetroArch, so I really recommend looking through this file, as you may need to come back later and tweak it to resolve problems with sound in games. When you’re done looking around, exit vim without saving the file by typing
:q
Then hit Enter. See, nothing to it.
Back on the USB keyboard attached to the RPi, log in and enter
cd ~/RetroPie/emulators/RetroArch/tools
This puts you in the directory containing the retroarch-joyconfig utility that you’ll use to set up the controller. (If you’re getting an error message about files or directories not being found, you may be using a US keyboard but the RPi is still set to a UK keyboard layout. This would cause the tilde key “~” on the keyboard to enter a logical negation symbol “¬” instead. The tilde in a path in Linux is expanded to be the current user’s home directory, and the logical negation symbol is not. Re-read step 1 for instructions on how to launch the raspi-config utility to change the keyboard layout.)
Launch the retroarch-joyconfig utility with the line:
./retroarch-joyconfig -o p1.cfg -p 1 -j 0
Follow the instructions to push the buttons and move the sticks/triggers/dpad. (The -o switch causes the output to be sent to a file, p1.cfg, otherwise, the output is just echo’d to the screen, which is interesting but doesn’t help us set up RetroArch.) If you mess up, just keep pressing buttons until the utility exits and then start all over again by relaunching the utility with the same command line.
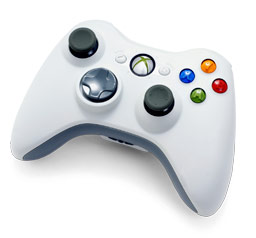
Xbox 360 controller (click to enlarge)
When you’re satisfied that you have pushed all the right buttons, you should have a p1.cfg file located at ~/RetroPie/emulators/RetroArch/tools. The contents of this file is what will eventually tell RetroArch and each of the various system emulators how to interpret the commands coming from the primary, first controller, but it needs to be appended to the end of that retroarch.cfg file first. To do this, enter:
sudo cat p*.cfg >> ~/RetroPie/configs/all/retroarch.cfg
The end of my retroarch.cfg file looks like this, after I appended the p1.cfg file to it and then further edited it by hand to add some extra commands for exiting the emulator and saving and loading gamestates (one of the best things about playing games on an emulator is that you can save the current state of the game at anytime, and later resume from that point in time, so you don’t need to rely on in-game saves).
input_player1_joypad_index = "0"
input_player1_b_btn = "1"
input_player1_y_btn = "3"
input_player1_select_btn = "6"
input_player1_start_btn = "7"
input_player1_up_axis = "-7"
input_player1_down_axis = "+7"
input_player1_left_axis = "-6"
input_player1_right_axis = "+6"
input_player1_a_btn = "0"
input_player1_x_btn = "2"
input_player1_l_btn = "4"
input_player1_r_btn = "5"
input_player1_l2_axis = "+2"
input_player1_r2_axis = "+5"
input_player1_l3_btn = "9"
input_player1_r3_btn = "10"
input_player1_l_x_plus_axis = "+0"
input_player1_l_x_minus_axis = "-0"
input_player1_l_y_plus_axis = "+1"
input_player1_l_y_minus_axis = "-1"
input_player1_r_x_plus_axis = "+3"
input_player1_r_x_minus_axis = "-3"
input_player1_r_y_plus_axis = "+4"
input_player1_r_y_minus_axis = "-4"

# Hold the back or select button (6) while pressing another button for
# special actions, like...
input_enable_hotkey_btn = 6

# ...the Xbox Guide button (8) to exit the emulator
input_exit_emulator_btn = 8

# ...the left bumper (4) to save the game state to the current slot
input_save_state_btn = "4"

# ...the right bumper (5) to load the game state from the current slot
input_load_state_btn = "5"
Note to self: I need to update this tutorial with instructions on how to configure multiple controllers.
Each console emulator can have its own retroarch.cfg file that overrides the settings in the default file at ~/RetroPie/configs/all/retroarch.cfg. For the NES emulator, the retroarch.cfg file lives at ~/RetroPie/configs/nes/retroarch.cfg (in a /nes/ directory under /configs/, at the same level as /all/). If you are using an Xbox 360 controller and don’t configure the NES retroarch.cfg file specifically, the B and A buttons will be reversed from the original controller layout, and you’ll have to use the D-pad (which is not great) instead of the left analog stick.
In case you don’t remember the button layout of the NES controller…
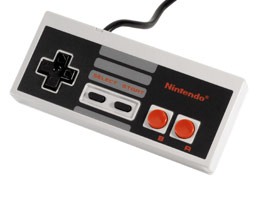
NES controller (click to enlarge)
So, I would strongly recommend dropping the following file into ~/RetroPie/configs/nes/retroarch.cfg for a better experience.
# All settings made here will override the global settings for the current emulator core

# The original Nintendo controller has the B button on the left and the A button on the right
# which is reverse of the Xbox 360 button layout.  Your ten-year-old self wants you to fix this
input_player1_b_btn = "0"
input_player1_a_btn = "1"

# It would be nice to be able to use the left joystick as well as the D-pad in Nintendo games
# but it seems to be an either-or situation, because only the _axis buttons are honored
input_player1_up_axis = "-1"
input_player1_down_axis = "+1"
input_player1_left_axis = "-0"
input_player1_right_axis = "+0"
Now you should be all set to play NES games using the Xbox 360 controller with pretty intuitive controls. The Xbox 360 controller-to-Nintendo controller mappings are as follows: the left analog stick replaces the D-pad, the A and B buttons are the B and A buttons, the Back button is the Select button, and the Start button is the Start button.
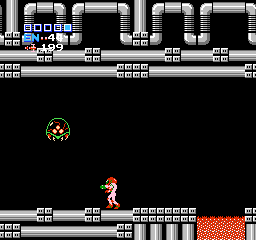
In a hurry to see Mother Brain again
The Super Nintendo controller has four buttons, like the Xbox 360 controller, but the X/Y and A/B buttons are reversed. If you’re going to be emulating SNES, you’ll most likely want to make an SNES-specific retroarch.cfg file for that game system, too.
This is my best-guess for a Super Nintendo retroarch.cfg, without actually having tested it yet.
# All settings made here will override the global settings for the current emulator core

rewind_enable = false

# The Super Nintendo controller's button layouts are the reverse of the Xbox 360 controller
input_player1_b_btn = "0"
input_player1_y_btn = "2"
input_player1_a_btn = "1"
input_player1_x_btn = "3"

# It would be nice to be able to use the left joystick as well as the d-pad in Super Nintendo games
# but it seems to be an either-or situation, because only the _axis buttons are honored
input_player1_up_axis = "-1"
input_player1_down_axis = "+1"
input_player1_left_axis = "-0"
input_player1_right_axis = "+0"
OK. The controllers should now work as expected in games. So…
Get impatient and try playing a game
Assuming you haven’t had any insurmountable problems with the directions above, you should be able to get into a game in a few simple steps:
1. plug everything into the RPi (USB keyboard, HDMI output to TV/monitor, and a wired Xbox 360 controller or Xbox 360 wireless gaming receiver dongle)
2. turn on the Xbox controller (if you need to link the controller with the dongle, you may have to reboot once this has been done before the RPi will see it)
3. power on the RPi (or reboot with sudo shutdown -r now from a terminal) and log in as the ‘pi’ user
4. at the prompt, type emulationstation to launch the Emulation Station front-end
5. use the arrow keys on the keyboard or the left analog stick on the Xbox 360 controller to browse the game systems and ROMs and the Enter key or A button to launch a game system or game.
And you should definitely pat yourself on the back for getting this far.
But your game probably won’t have sound.
Wrestle with the sound
I’m using a pair of headphones plugged into the analog jack, and while many people report that the game’s audio when output through HDMI is generally fine, the audio out through the analog jack was decidedly not fine with the default settings back in October, 2012. The sound would start off fine, but within 20-30 seconds it started becoming increasingly choppy and a few moments later I was ripping off the headphones. I Googled this a ton, and eventually used the options recommended at https://github.com/petrockblog/RetroPie-Setup/wiki/Sound-Issues by uncommenting and/or editing these lines in the retroarch.cfg file. Depending on your experience, you can do so using vim or your text editor via WinSCP:
audio_enable = true
audio_out_rate = 44100
audio_driver = sdl
I had read a bit about ALSA and very little about SDL, but from what I could tell, it boiled down to ALSA (which was in alpha on the Raspberry Pi in late 2012) should be faster than SDL once ALSA is working completely. If ALSA is not working completely or if the RPi is under considerable load, we are better off using something else, and that something else seems to be SDL.
When I rebuilt the RPi in 2014, I still had to modify the audio settings in retroarch.cfg, but I found that ALSA worked fine. The settings I’m currently using are:
# Enable audio.
audio_enable = true

# Audio output samplerate.
audio_out_rate = 44100

# Audio driver backend. Depending on configuration possible candidates are: alsa, pulse, oss, jack, rsound, roar, openal, sdl, xaudio.
audio_driver = alsa
Using these settings also avoids the warning message visible in the console when RetroArch exits while the sound is misconfigured:
RetroArch [WARN] :: Audio rate control was desired, but driver does not support needed features.
If the volume in games is too low, and you are using ALSA, you can increase it at the terminal prompt with the command:
amixer sset PCM,0 90%
I have both an Xbox 360 and my Raspberry Pi hooked up to the same TV via HDMI, and 90% volume on the Raspberry Pi seems to match the volume of the Xbox pretty closely, so that I don’t need to turn the TV up or down when I switch consoles.
So that’s it, you should be able to play those old NES games now, with the glorious, mesmerizing 8-bit sound, but with the far more comfortable Xbox 360 controller.
The Esc key on the keyboard will exit the game and return to the Emulation Station GUI, by default, and if you’ve used my retroarch.cfg file above, you can do this with the controller by holding the Back button and pressing the silver Xbox Guide button.

Great !!
What else?
The keyboard is still convenient for saving and loading game states, and I don’t know if all of the functions can be mapped to buttons on the controller (it sounds like it’s not possible), so it stays within reach for now. To enable keyboard shortcuts to save and load save states, uncomment the following lines in retroarch.cfg.
# Saves state.
input_save_state = f2
# Loads state.
input_load_state = f4

# State slots. With slot set to 0, save state name is *.state (or whatever defined on commandline).
# When slot is != 0, path will be $path%d, where %d is slot number.
input_state_slot_increase = f7
input_state_slot_decrease = f6
While playing a game:
F2 – save state to current slot (defaults to slot 0)
F4 – load state from current slot (defaults to slot 0)
F6 – decrease the save slot (defaults to slot 0)
F7 – increase the save slot (defaults to slot 1)
Other useful features can be enabled in retroarch.cfg by uncommenting the lines:
# Mute/unmute audio
input_audio_mute = f9

# Take screenshot
input_screenshot = f8
While playing a game:
F8 – take a screenshot (saved to the ROM’s directory by default, but this is configurable)
F9 – mute audio
The rewind feature in RetroArch is also awesome, and allows to you literally rewind the game – going back in time a few seconds so that you can replay it differently. This comes at a CPU and storage cost, so you may or may not see a performance hit when rewind is enabled. To enable rewind, uncomment the line:
# Enable rewinding. This will take a performance hit when playing, so it is disabled by default.
rewind_enable = true
While in the Emulation Station GUI (such as it is):
Arrow keys – navigate through ROMs and systems (consoles)
Enter – launch the selected ROM
F1 – adjust the settings (including the master volume), restart or shutdown the Raspberry Pi
F4 – terminate Emulation Station and return to the command prompt in the terminal
Recently, themes for each console have been developed for the Emulation Station, which I think everyone who saw it in 2012 would agree really needed a designer’s touch. I would recommend experimenting with the ES Scraper utility, which should download themes for the consoles and boxart for your games automatically.
So that’s that. I’m playing Final Fantasy and Super Mario Bros. 3 for the first time in years, and it’s pretty neat.
Outstanding problems
Some games, or maybe all games that scroll from top to bottom, but certainly Final Fantasy and Dragon Warrior, tend to artifact at the top and bottom of the screen when walking north and south on the world map. I haven’t begun to try to tinker with the video settings in order to alleviate this problem, but I imagine the fix is in there somewhere.
I seemed to be having a problem restoring from save states when I built my first RPi/RetroArch box back in early October, 2012. If I changed to a different emulator (and possibly to another game within the same emulator), I lost the ability to later load from a save state. The load would fail. I could, however, successfully save and load game states as long as I stayed within a single game. It doesn’t seem to be a very common problem, however, as I’ve only found one thread that describes exactly my initial problem, and that was for RetroArch on the PS3: http://forum.themaister.net/viewtopic.php?id=231. In that thread, the OP pinpoints the problem to changing emulators, after which the save state files cannot be loaded. To my mind, this indicates the problem lies outside the save state files themselves. Resolving this problem was one of the reasons I rebuilt the whole thing from scratch in late January, 2013.
But sadly, my problem was not resolved with the rebuild and in some ways was actually worse after the rebuild. Not only could I neither save nor load states in games with save state files created before the rebuild, but now, instead of the save/load message that is typically output to the screen as yellow letters, I just got a black box (possibly with black letters, rendering the text impossible to read) whenever I triggered a save or load. After I renamed or deleted the old savestate files in the ROM’s directory, I was able to create a new save state without issue and load it.
This was rather disappointing for games that I had been playing for awhile and was relying on the save state, but I guess I can live with starting over.
A possible work around to this problem, for games that support saving in-game, is to use the rewind feature instead of save states to undo mistakes as soon as they happen, and then rely on the in-game saves. For games that don’t support in-game saves, I guess I’m S.O.L. until I get it figured out.
I was having a few problems with xboxdrv and wireless controllers, in the early days. When using the USB Xbox 360 Wireless Gaming Receiver for Windows through a USB hub, approximately 60 seconds after launching xboxdrv, xboxdrv will crash and I’ll get an error stating [ERROR] USBController::on_read_data(): failed to resubmit USB transfer: LIBUSB_ERROR_NO_DEVICE followed by Shutdown complete. This doesn’t happen when using a wired controller or when the USB Xbox 360 Wireless Gaming Receiver for Windows is connected directly to the USB port on the RPi, so maybe a powered USB hub would produce a better experience. I’ve also heard that the Xbox 360 Wireless Gaming Receiver for Windows draws a lot of power, so it may be a good idea to get it working through a powered hub anyway.
I remember her hair differently…
You can stop reading now. Everything below this point are my notes on how things used to be done.
The manual way of starting up xboxdrv for a single controller is to just run
sudo xboxdrv --trigger-as-button --silent
at the command prompt each time you turn on the RPi, but you could start this up automatically, too. If you don’t run it with sudo, you’ll get an error: USBController::USBController(): libusb_open() failed: LIBUSB_ERROR_ACCESS. The creator’s proposed workaround is to add the current user to the ‘root’ group, which I’m not terribly keen on, so I’d be content with just continuing to run it with sudo. If you want to see your joystick axis and button press information output to the console, just run sudo xboxdrv without the –silent switch, but this eats up some CPU, so use the –silent switch when you’re going to be playing games.
The automatic way of starting up xboxdrv for a single wireless controller is to add the command to /etc/rc.local, which is a file that runs (like a script) at the end of multi-user boot levels (think: before a user logs on). It makes sense to start up xboxdrv automatically, particularly because we want to pass some arguments that would be annoying to type each time. While connected via PuTTY, start by backing up /etc/rc.local with
sudo cp /etc/rc.local /etc/rc.local.bak
Open /etc/rc.local using the vim text editor with
sudo vim /etc/rc.local
Arrow down to the line immediately before exit 0, hit the Esc key, and type or copy and paste
xboxdrv --dpad-as-button --trigger-as-button --wid 0 --led 2 --deadzone 4000 --silent &
then hit Enter, and type
sleep 1
Hit Esc again, type
:wq
Then hit Enter to save the changes and exit the editor. Reboot the RPi again, and now you should see that the Xbox 360 driver is up and running even before the login prompt appears. How’s that for awesome?
(The official instructions in the Using a single controller section of the xboxdrv manual at http://pingus.seul.org/~grumbel/xboxdrv/xboxdrv.html don’t seem to apply to the RPi at this point, as the xpad driver isn’t loaded and the upinput and joydev modules are loaded during boot.)
If you want to be even more slick and automatically start up support for up to 4 controllers, check out https://github.com/petrockblog/RetroPie-Setup/wiki/Setting-up-the-XBox360-controller.
(I initially had some problems with analog joysticks and triggers not registering in the retroarch-joyconfig utility until I started passing the –trigger-as-button switch when launching xboxdrv. However, even when the analog sticks are mapped by retroarch-joyconfig, I don’t have the use of them in NES games like Metroid, and that’s mostly OK by me, except that the dpad on the Xbox 360 controller has always seemed horribly sloppy to me, even in Xbox games. For some reason, the analog joystick movements would be picked up by xboxdrv if I omitted the –trigger-as-button switch, but not by the retroarch-joyconfig utility. The problem with the triggers is that without the –trigger-as-button switch, each trigger pull and release counts as two analog axis movements. This is desired for games where the trigger acts as a brake or gas pedal, but NES and SNES games have little or no use for this. Analog joysticks behave the same way, throwing tons of input at the slightest movement when the NES really just needs to know when it’s been pushed and released. It’s possible to turn the analog sticks off entirely by passing xboxdrv the –dpad-only switch, but what I really want is to accurately control NES games with the far more reliable left analog stick – something I’m still working on.) Update: the workaround for this is to use a NES-specific retroarch.cfg file that maps the left analog stick to the same buttons as the dpad – leaving you without a dpad in NES but with the left-analog stick.
(If you get an error “Couldn’t open joystick #0.”, it probably means that xboxdrv needs to be restarted first.)


